How to Teach a Child to Draw: An Age-by-Age Guide (3–10)
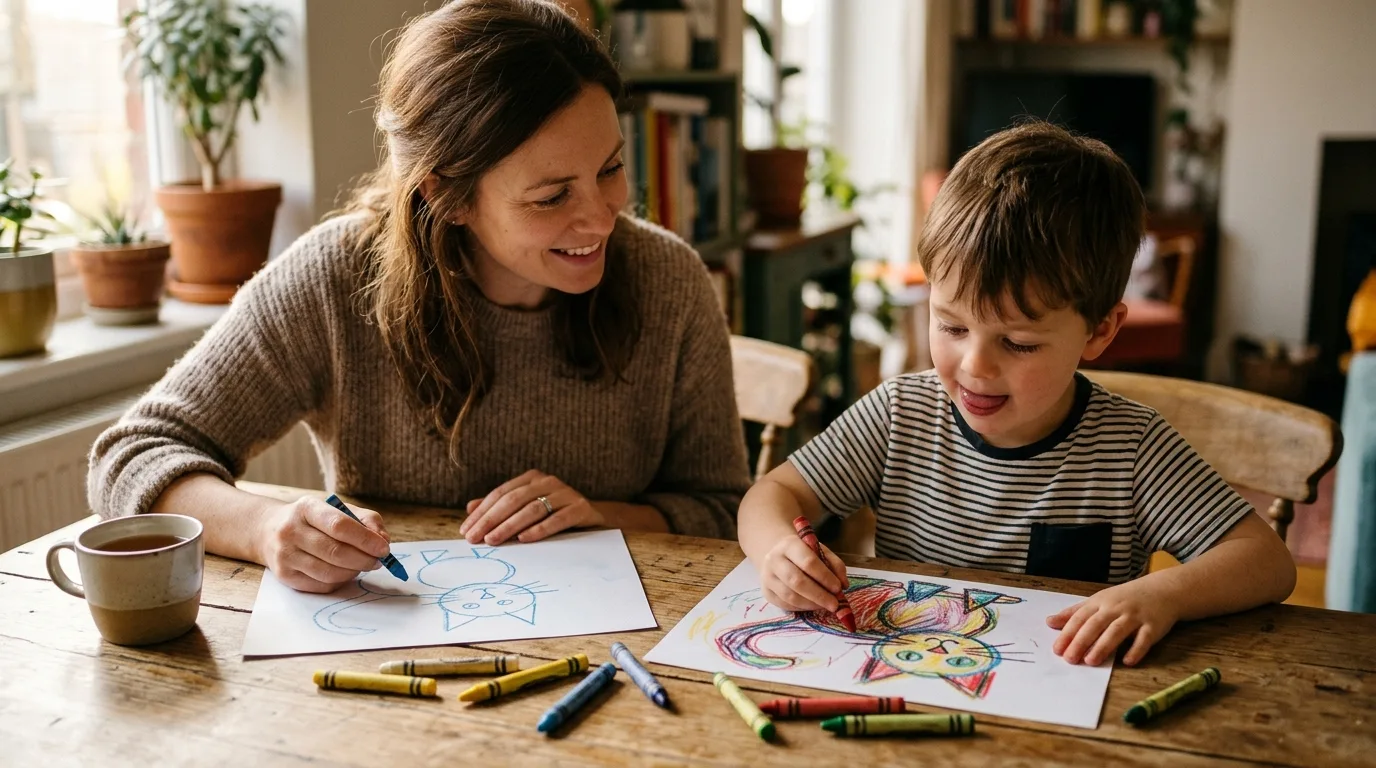
Your five-year-old pushes a sheet of paper across the table. “Draw me a dragon.” You pick up the pencil, make something that looks more like a potato with spikes, and hear the verdict: “That’s not a dragon.” Then the follow-up, the one that stings: “Teach me how.”
If that’s the moment you’re in, this guide is for you. Learning how to teach a child to draw doesn’t depend on your own drawing. What children need from a parent is someone who sits beside them, names the shapes and keeps it fun. Below is an age-by-age plan for ages 3 to 10, a shape-by-shape method you can use tonight, a 10-minute session format and the mistakes almost every parent makes once.
The short answer
Sit beside your child with your own sheet of paper. Name the shapes out loud (“a big oval, then a small circle on top”), go one step at a time and keep the session to about 10 minutes. Never draw on their page. When the last step is done, ask them to change something so the drawing becomes theirs.
That’s the method. The rest of this guide is about how it changes with age.
You don’t need to be able to draw
Most step-by-step drawing for children is built from a handful of shapes: circles, ovals, triangles, squares, lines and curls. A cat is an oval with a circle on top, two triangles and a curl. If you can say that sentence, you can teach a child to draw a cat.
Your wobbly drawing is actually useful. When a child sees a grown-up make a lumpy circle, shrug and carry on, they learn the most important drawing lesson there is: mistakes are part of it. Children who believe drawing is a talent you either have or don’t tend to give up early, and our guide on how to encourage kids to draw is about getting them past that wall.
So drop the idea that you need to demonstrate skill. Your job is to break a picture into steps, say them clearly and enjoy it.
What to teach at each age
Children move through recognisable drawing stages, from scribbles to “tadpole” people to detailed scenes. Our guide to children’s drawing development stages covers what’s normal at each one. Teaching works best when it fits the stage your child is already in.
Ages 3–4: explore first
At this age, drawing is mostly about discovering what a crayon can do. Offer chunky crayons, big paper (A3 or a roll taped to the table) and lots of time to scribble. Children usually start making deliberate circles at around 3, and crosses and squares a little later.
Teaching here is light. Draw a circle on your page and say “round and round”. Let them try on theirs. When they’ve drawn something, say “tell me about it” instead of guessing. If you’re not sure what to say about a drawing, our piece on how to talk to kids about their art has scripts that work.
Ages 5–6: shapes into things
This is where step-by-step lessons (often called directed drawing) start to click. Five- and six-year-olds draw things on purpose and love the moment four shapes suddenly become a dog. Do one lesson per session, with four to six steps. A little tracing helps with control, as long as it’s followed by a freehand try.
Ages 7–10: looking and placing
Older children want their drawings to look right. Teach them to look carefully: draw a real mug or a pet from life, notice that far-away things are smaller, and overlap shapes so one sits in front of another. Around 8 to 10, many children become self-critical and some stop drawing altogether. Psychologists have described this dip in artistic confidence for decades. Keep the focus on ideas and practice, not on talent.
| Age | Free play vs guided | Best activities | Ready for the next step when… |
|---|---|---|---|
| 3–4 | About 80% free play, 20% guided | Scribbling, circles and lines, drawing alongside you, “tell me about it” | They draw circles and lines on purpose and start naming what they’ve drawn |
| 5–6 | About 50/50 | Four- to six-step shape lessons, short tracing warm-ups, drawing favourite animals | They can follow a step-by-step lesson and then change it on their own |
| 7–10 | About 30% free play, 70% guided practice | Drawing from life, proportion, overlapping, comics and characters | They ask how to make things look “real” or “right” |
The shape-by-shape method, with a worked example
Every step-by-step lesson follows the same order: the biggest shape first, the smaller parts next and the face last. Big shapes set the size and position, so small parts have somewhere to go. Leaving the face until the end means a wobbly ear never ruins the expression.
Here’s the cute cat from the DrawToLife app’s Learn to Draw lessons, in four steps. On a cute cat the head is the biggest shape, so that’s where it starts. Draw each step on your own paper, say it out loud, then wait for your child to do the same on theirs. The new part of each step is shown in red.
- Draw a round head. A big, wide oval in the top half of the page.
- Add pointy ears. Two triangles poking out of the top of the head.
- Draw the body. A rounded shape like an upside-down cup, tucked under the head.
- Add a curly tail, then the legs and the face. The tail curls up from one side, two pairs of lines make the legs, and the face goes in last: two dot eyes, a little triangle nose and a smile.
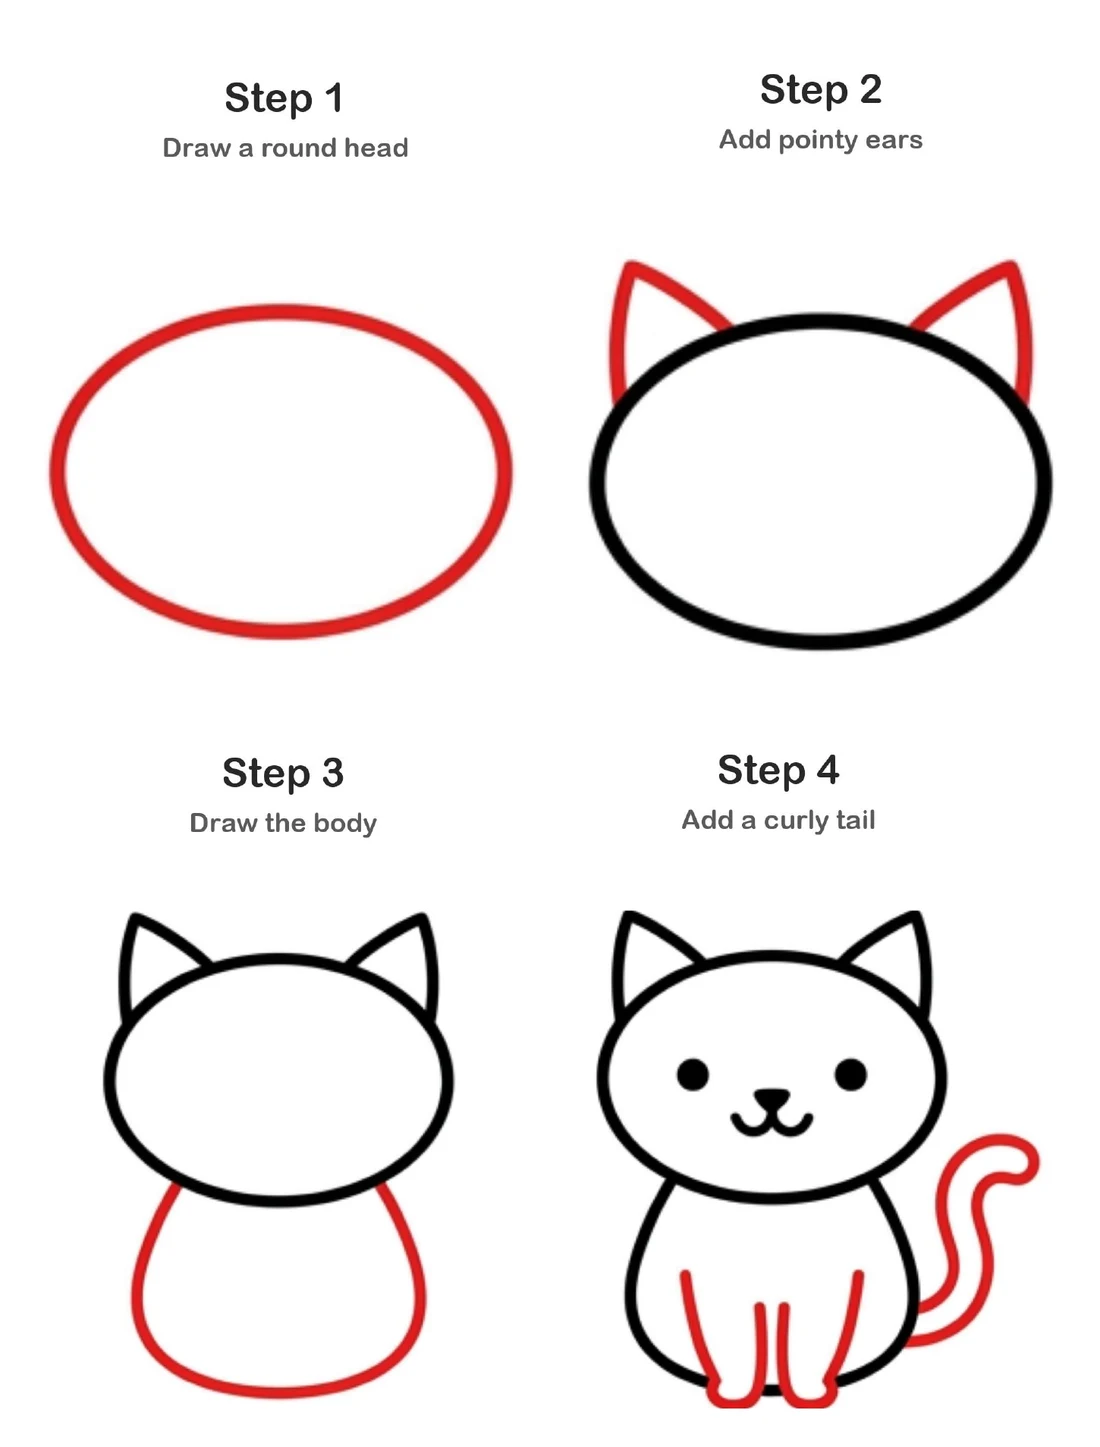
Want it on paper? Download the free cute cat printable (PDF), with one step per A4 page, and stick it up beside your child while they draw.
Then comes the most important step, which isn’t on the sheet: make it yours. Does the cat wear a hat? Is it a tiger? Is it flying? This turns copying into creating. The same method works for a dog, a fish, a robot or a dragon.
A 10-minute drawing session that kids ask for again
- Warm up (2 minutes). Wiggly lines, spirals, or a page full of circles.
- One lesson (5 minutes). Use the shape-by-shape method, with you on your page and your child on theirs.
- Make it yours (2 minutes). They add a twist: a background, a costume, a friend.
- Show and tell (1 minute). They tell you what’s happening in the picture. You listen.
Ten minutes is short on purpose. Stopping while it’s still fun is how you get “can we draw again tomorrow?”
Want a ready-made lesson tonight? DrawToLife’s Learn to Draw lessons for ages 3 to 10 work just like this: animals and characters drawn one shape at a time, with each step read aloud. They’re free with a free account and never use credits (they need an internet connection). Get the app.
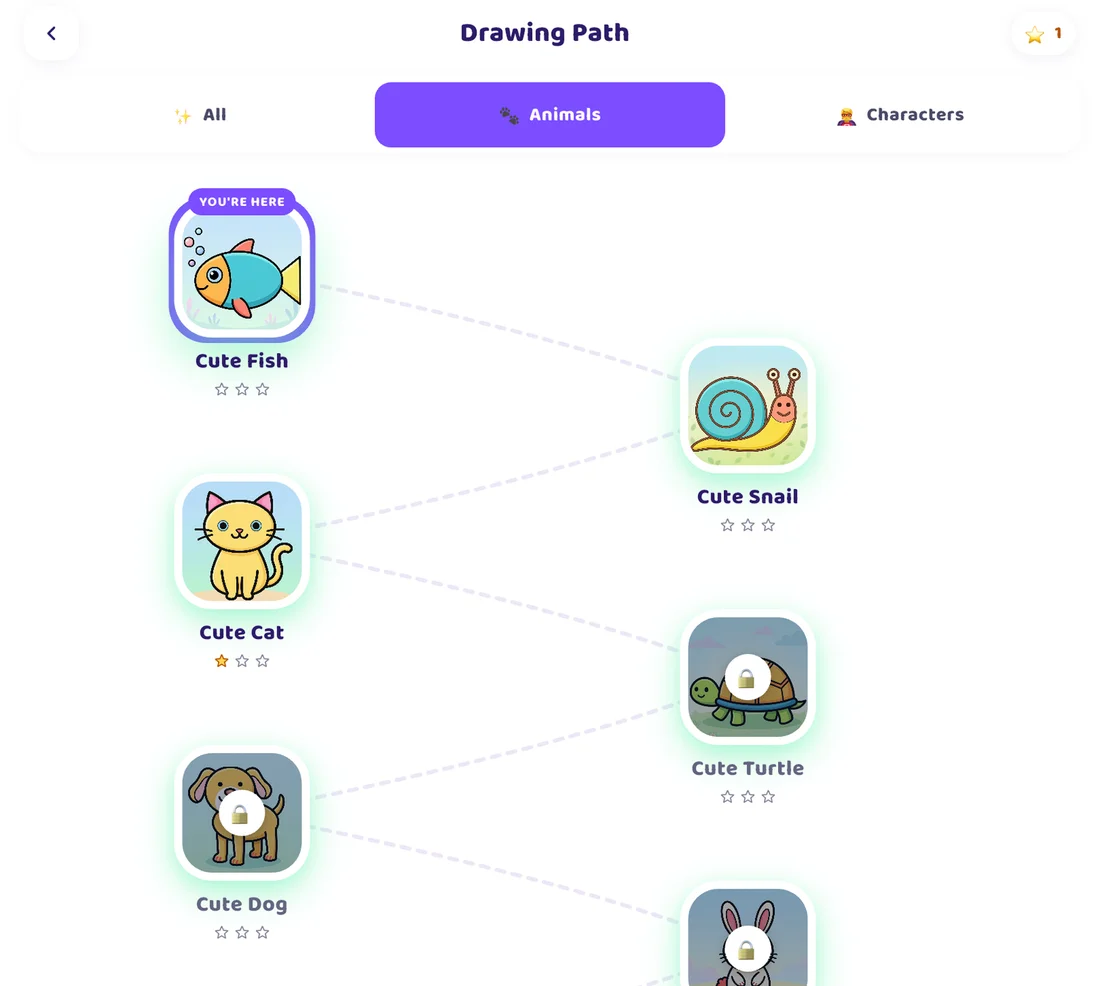
The lessons sit on a drawing path. The first few in each category are open straight away, and each one after that unlocks when your child finishes the one before. The locks mark progress, not payment.
7 mistakes parents make
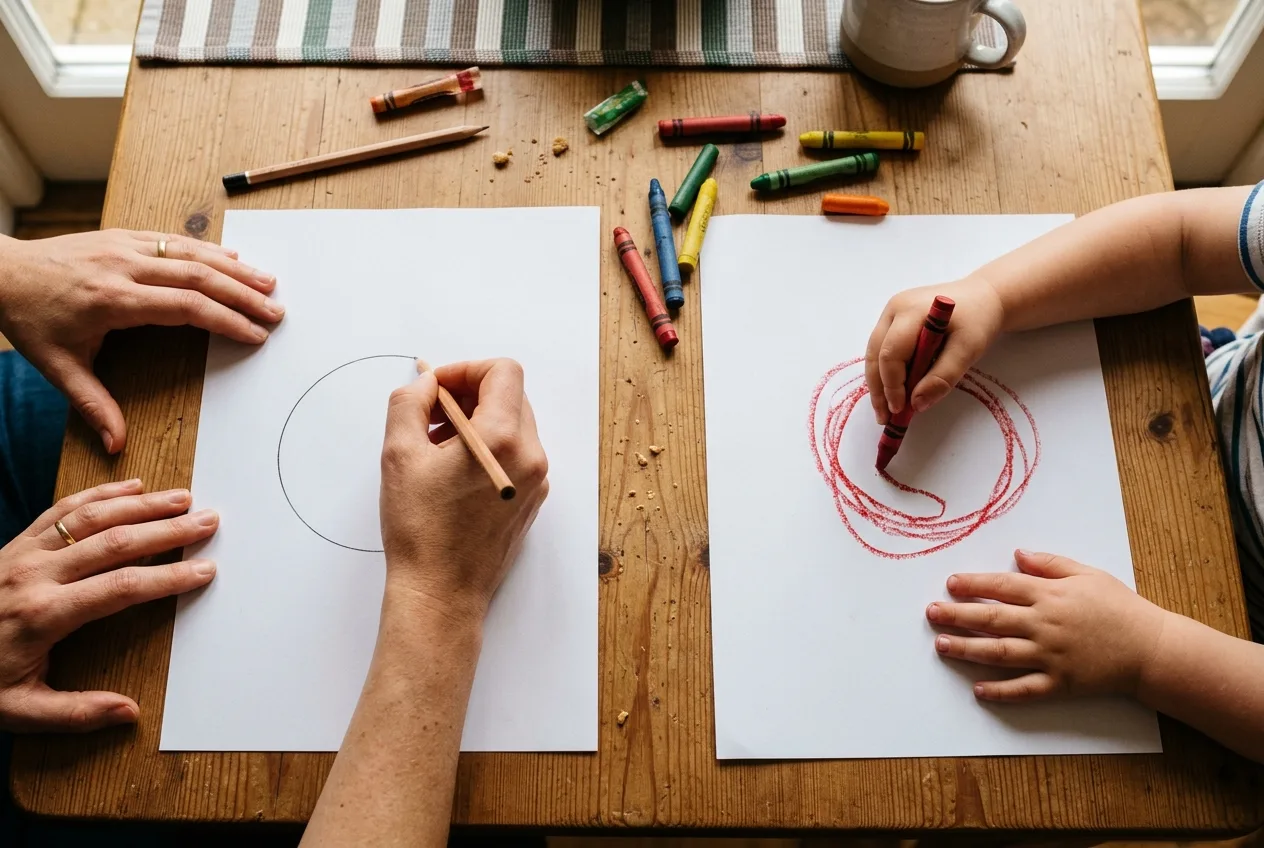
- Drawing on their page. Even one “helpful” line tells a child their version wasn’t good enough. Show them on your sheet instead.
- Correcting colours. Green dogs and purple suns are choices. Leave them alone.
- Asking “what is it?” It can sound like you can’t tell. Try “tell me about your drawing.”
- Sessions that go on too long. Ten minutes beats an hour that ends in tears.
- Paper that’s too small. Little hands draw big. A3 paper, or the back of a roll of wallpaper, gives them room.
- Only praising the result. Praise the effort and the choices instead, like “you kept going on that tricky ear.” Research on praise suggests this helps children stick with hard things.
- Comparing siblings. Each child’s drawing is a snapshot of their own stage, not a race.
Printables, videos or apps: what helps?
All three can help, and none replaces sitting together with paper.
| Option | Good for | Watch out for |
|---|---|---|
| Printable step-by-step sheets | 5+, quiet time, practising one subject several times | Children can feel they have to match the example exactly |
| Video lessons | Seeing the pencil move, older children working alone | Pace is set by the video, and autoplay can lead elsewhere |
| Learn-to-draw apps | Short guided lessons, children who like a screen prompt | Choose apps without ads, and keep paper drawing going too |
Whatever you choose, paper drawings count. The tool is there to give your child an idea and a starting point.
Keep them coming back: give the finished drawing a reward
Children draw more when their drawings go somewhere: on the fridge, in a frame, sent to a grandparent. A finished lesson drawing can also become something bigger, and some families use it as a reward at the end of the week. With DrawToLife, a child’s cat can become polished AI art, a short animated movie or a personalised story where the cat is the hero.
When your child has a few lessons behind them, try our fun drawing activities and drawing games for the whole family, so drawing never turns into a chore.
Frequently asked questions
At what age should a child start learning to draw?
Children start drawing on their own from about 18 months, with scribbles. Gentle guidance, such as naming shapes and drawing alongside them, works from about 3. Simple step-by-step lessons usually click at around 5, when children start drawing things on purpose.
How do I teach my child to draw if I can’t draw?
You don’t need to draw well. Teaching drawing to young children is mostly naming shapes: “a big circle for the body, a smaller circle for the head”. Draw on your own sheet beside them, go one step at a time, and let your wobbly version show that nobody has to be perfect.
Should I correct my child’s drawing?
No. Don’t draw on their page or fix their colours. If they ask for help, show them on your own paper and let them try again on theirs. A purple cat is a choice, not a mistake.
Is tracing bad for learning to draw?
Not in small amounts. Tracing builds pencil control and helps children feel how a shape moves. Use it as a warm-up, then ask them to draw the same shape freehand.
How long should a kids’ drawing lesson be?
About 10 minutes for children aged 3 to 6, and 15 to 20 minutes for children aged 7 to 10. Stop while they’re still enjoying it, so they want to come back.
What should a 5-year-old be able to draw?
Most five-year-olds can draw a recognisable person with a head, body, arms and legs, plus a house, a sun and a tree, using circles, squares, triangles and lines. There’s a wide range of normal, so compare your child with their own drawings from six months ago, not with other children.
Are there free apps that teach kids to draw?
Yes. Several apps offer free step-by-step drawing lessons for young children. DrawToLife’s Learn to Draw lessons, for example, are free with a free account and never use credits (they need an internet connection). Paper lessons work just as well, so treat an app as an extra, not a replacement. Our app comparison covers what else is out there.
The potato dragon
Remember the potato with spikes? Keep it. Draw the same dragon again in six months, side by side with your child, one shape at a time. Yours will probably still look like a potato. Theirs won’t, and they’ll know they learned it sitting next to you.